

The Local newsletter is your free, daily guide to life in Colorado. For locals, by locals.
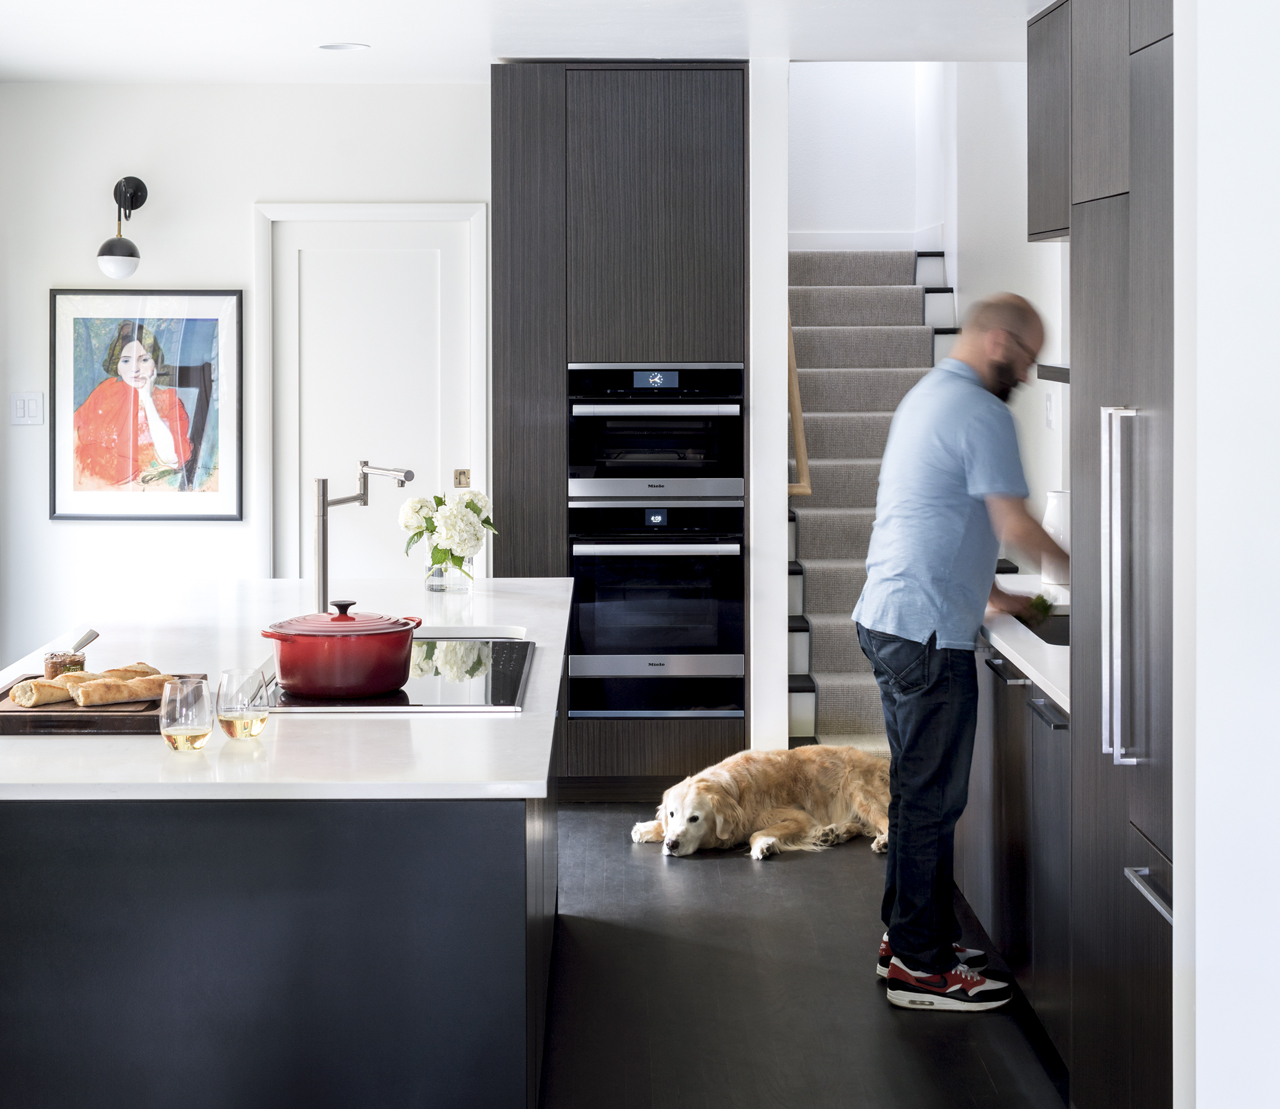
It’s an oh-so-familiar design narrative: After battling a small and outdated kitchen, a newlywed couple cries out for help—in the form of a designer who can transform the most-used room in the house into a functional showpiece. So it went with Park Hill residents Joel and Lindsey Doub, who called on Megan Moore of Dado Interior Architecture & Design to rescue them from their dark, dysfunctional space. “There was plaster over the hardwood floors, a Quaker-style door, a butcher-block island, and it was just like a cave,” explains Moore of the original 14-by-20-foot kitchen. “It wasn’t integrated at all, and the refrigerator was in the adjacent mud room. It felt very closed and low because the ceiling had a lot of soffits, and it had a lot of cabinetry, but it wasn’t really efficient.”
Apart from the immediate need to transform the disjointed space, the couple also wanted an updated design to accommodate their soon-to-be-expanding family: If Moore could revamp the kitchen, they could see this home as their dream house, the place where they’d raise kids.

Moore began by flipping the layout of the L-shaped kitchen and replacing an existing wall of cabinets with a 16-foot-long sliding glass door that opens to the side yard—a move that added natural light and maximized square footage. “The new door really makes the kitchen feel a lot bigger,” Moore says. “And by giving access to the side yard, which has a dining table and grill, you get the illusion of more square footage without stealing from other rooms.” The kitchen’s sleek palette and minimalist lines, anchored by ebony veneer cabinetry and white Caesarstone countertops, also give the impression of a more spacious room.

But a streamlined look must be supported by functionality—else it won’t last. “Lindsey cooks a lot, and it really was a matter of figuring out how we fit as many toys into this kitchen as possible,” Moore says. “It was kind of a game of Tetris to make everything look intentional and as if it has its place.” A slew of space-saving solutions make the room work well: pullout cabinets equipped with trash bins, two ovens (one of them a combi) stacked over a warming drawer, and a neatly concealed one-foot-deep pantry for dry goods.

Cheat Sheat
Moore’s tips & tricks for small spaces.
Designate zones. When planning your kitchen, create areas based on tasks: prepping food, cooking, cleaning, and storing. Here, Moore added a separate space that’s accessible—but out of the way of daily activities—to stash china. To start your own plan, think of your layout as a “work triangle”: imaginary lines extend from the sink to the center of the stove and to the refrigerator.
Get organized. Start by editing down your kitchen utensils and small appliances. Ask yourself two questions: What does this do for me? When’s the last time I used it? Open up every single cabinet and touch each item. And if you can’t resist hoarding, give yourself a single drawer as a catchall. When it gets full, it’s time to purge.
Hold off on the paintbrush. Choose cabinets and countertops first; paint last. “With paint, you can’t really know how it is going to look unless you test the color in your space,” Moore says. “But it’s also one of the very last things you should do. DIYers always want to paint first. It’s important to see how it plays off the cabinets and countertops.”