

The Local newsletter is your free, daily guide to life in Colorado. For locals, by locals.
The home pizza oven craze that started during the pandemic is showing no signs of slowing down, fueled by a surge of easy-to-use, affordable units that easily fit into almost any backyard or balcony environment.
In fact, market studies project that U.S. sales of home pizza ovens will grow to $402 million by 2027 from $301 million in 2021. But whether you have an Ooni, Gozney, Stoke, or any of the other brands for sale today, successful at-home pizza making takes more than just firing up the propane. It’s a mixture of science, art, and luck that takes time to learn and develop.
Baking anything at Denver’s elevation, from bread to cakes, adds additional challenges. So we spoke to the experts at some of the city’s top pie restaurants to get the lowdown on high-elevation pizza making.
Start with a well-hydrated dough.
Regardless of your location, these ovens are designed for baking soft, crispy, and flavorful crusts. “Baking at altitude is finicky, but it doesn’t have to be,” says Brian Wilson, executive chef at Cart-Driver’s LoHi location. “Just look at your dough recipe as an equation, then narrow down and isolate the variables.”
The main variables involved are hydration and fermentation. These will differ based on the type of pizza you’re making, such as a traditional Neapolitan pizza versus a New York–style pie. But there are some general guidelines to follow.
“The biggest thing you have to deal with is the fact that we live in, essentially, a desert,” says Luke Miller, executive chef at the Greenwich. “It’s dry, so you need to add more water.”
That means increasing the amount of water any sea-level recipe calls for by about 5 percent, as a rule of thumb. For a more advanced option, embrace baking with a scale and calculate how much water you add as a percentage of the total weight of flour. For instance, adding 600 grams of water to 1,000 grams of flour results in a dough that’s 60 percent hydrated.
“Generally, at sea level, you’re in the 65 to 70 percent range for artisanal Neapolitan pizza,” Miller says. “Once you get up here, you’re adding about 5 percent hydration, so you’re in the 70 to 75 percent range. You can adjust from there.”
That additional water can result in a sticky dough, which may be difficult for beginners to work with. If you’re having problems handling the mixture, feel free to sprinkle a little more flour on it; it’s easier to add flour to a wet dough than to add water to a dry one.
Or go for a New York–style pizza, which is often easier for novices, according to Redeemer Pizza’s chef-owner Spencer White. “Most New York–style dough is [around 60 percent] hydration,” White says. “So maybe work your way up…. The wetter your dough is at high elevation, the better it’s going to turn out.”

Ferment the dough for less time.
The next step is letting the dough ferment, typically by adding yeast to the flour-water mixture. While you don’t need to alter the amount of yeast in your recipe, higher elevation does affect how long you should let it rise.
“There’s less atmospheric pressure to overcome,” Miller says. “You literally have less weight from the atmosphere on the dough, so it takes less time for it to double in volume.”
Most basic pizza dough recipes measure the fermentation period in hours, so to start with, Miller recommends reducing the timeframe by 15 to 30 minutes. But since the temperatures of both the dough and the kitchen greatly affect how fast the dough rises, it’s a good idea to simply wait for it to double in size and then stop, no matter how much time has passed.
“Regardless of anything else, dough temperature (and temperature, in general) is going to control your rate of fermentation more than any other aspect,” Miller says. “Sometimes your best bet is to set a target temperature for your dough, generally 76 degrees, and go from there.”
All the chefs we spoke with say that it’s better to stop fermentation too early than let it proceed for too long, because an over-fermented dough becomes weak and difficult to shape. “If you let it rise for too long, it becomes really hole-y, meaning there’s lots of thin spots in it and it’s gonna be much easier to tear,” Wilson says.
Bake your pizza at a lower temperature.
Although one of the biggest benefits of outdoor pizza ovens is the heat they generate—up to 900 degrees in many cases—there are several reasons why you shouldn’t crank it up that high in Denver. Because water’s boiling point is lower at high elevation, it takes less heat to make the water in the dough “pop” in the oven to yield a fluffy texture.
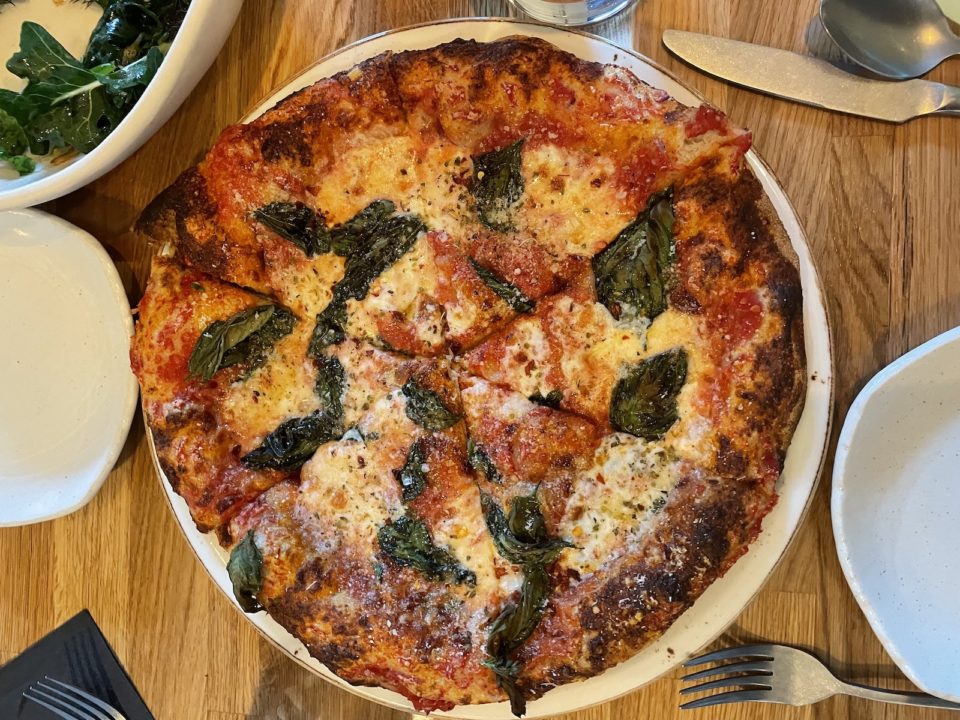
That affects the leoparding process, during which dough bubbles form and darken faster than the rest of the crust, creating small dark spots throughout.
“At high altitude, the lower boiling point is going to spring your dough up really quick, and your leopard is going to burn too quickly,” Wilson says. “You’re going to end up with burned dough or having raw dough in the middle.”
Moreover, most backyard pizza ovens are a lot smaller than professional ovens, which means there’s less room to move pizzas around inside if they’re cooking too fast or slow. Either increases your risk of ruining the dough.
“They get so hot that it can be tricky to control your temperature,” Miller says. “Just be careful about not getting it too hot. At Greenwich, we tend to bake pies at like 600 degrees max. As a home baker, if you can hit that temp, it’s probably easier to keep it from burning, as things don’t happen as quickly. There’s more room for error [at lower temperatures].”
Remember you’re going for leoparding, not panthering. But how hot is too hot depends on your oven, your dough, and your experience. The only way to find out is to push the limits.
“Burn a couple,” Wilson says. “What’s the worst thing that can happen? It’s a little bit of flour and a little bit of water.”
Bonus: The chefs sound off on…
Toppings: Less is more. Too much sauce will make the dough too wet, resulting in a big mess in the oven. “Don’t put anything in the center of the pie,” White says, “because when the crust pops up on the outside, it’s gonna push your toppings into the center.”
Flour: Several chefs were unenthusiastic about imported double zero flour, the finely milled flour called for in many Neapolitan-style recipes. “Personally, I’m not the biggest fan of double zero flour,” Miller says. “It’s got a crazy amount of protein in it, so it can end up being kinda chewy or feel under-fermented.” Fresh all-purpose flour and lower-protein bread flour work just fine.
Weather: While outdoor pizza in the winter is totally doable, be sure to assemble your pie inside your kitchen. The colder the dough, the less it will rise in the oven, “so bring it outside and put it in the oven as fast as possible,” Miller says.
Testing: White recommends making more dough than you need in order to conduct a few test bakes without toppings to see how that particular batch behaves. “Every batch of pizza is going to be a little bit different,” he says, “so use the [test] dough to check things in the oven…the temperature you’re cooking at, how the dough reacts.”
Fun: Ultimately, making pizza at home shouldn’t be stressful. “If you’re new to this and doing it at home, don’t get overzealous with super high hydration or overcomplicated recipes,” Miller says. “Start with something you can do in one day successfully.”